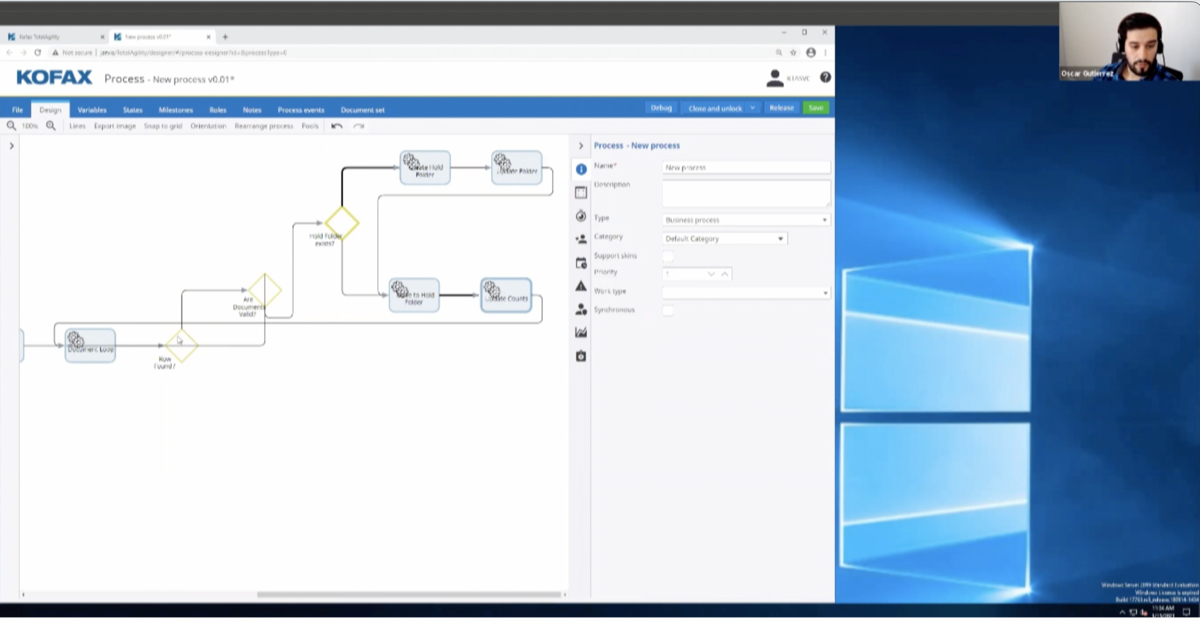
We’ll demonstrate how to set up email capture with Kofax Capture. Email Import Connector is a separate license and is installed on top of Kofax Capture. Once installed, you can launch Administrator to configure email capture settings. Let’s go ahead and launch Administrator as a first step of our setup here.
Once that is launched, you would see that there is an electronic documents menu item added to administrator. I will go ahead and click on the configuration and a pop-up window will open for the settings. The first thing which I’m going to do here is add the destination.
I will give a name to my destination. I will select the import content. I have an option to select either body first, followed by attachments, or to import attachments first, followed by body. I can also choose just to import the attachments or just to import only the email body.
I have various settings to choose here. I can include the original content. I can include message as EML file. I can include the complete message as MSG file.
I can do various conversions. I could either convert to TIFF or I could convert to PDF.
I have an option to choose the different page sizes, from letter, A3, A4, whatever is the required measurement. There is also an option to choose a conversion mode. Either I can only convert the image content, or I can convert only non-image content and normalize images, or I can just go ahead and convert everything, which will take a little bit more time than the other options.
Image format, typically it is advisable to choose 300-by-300, black-and-white format here, for the best image resolution. There is also an option to select various VRS settings. If choose to VRS all images, I can go to VRS settings and provide all these image enhancement settings. For more image clarity I can turn on the image clarity or could choose some other VRS setting for image enhancement.
Once that is done, I will go ahead and exit out of here. I will save the VRS parameters, then I can select the batch size. By default, it is one, which means that, for every email, single batch will be created. I can change it to more than that.
Batch priority, I can select a batch priority here. The default batch priority is five. That’s where it is displaying five. I can change it to two, for example, if I want my emails to have the priority as two. That is an option.
Then I will have to go ahead and start selecting the import mapping. I will select the batch class. All the batch classes, which are set up and published, will be displayed in this dropdown. We can select the one which we want batch to be created for.
Right now, I have one batch class. DemoBatchClass, I will select that. For document class I will select Loose Pages and I will let the recognition take care of the classification. I have an option to give mapping for batch fields here if they exist.
I can go ahead and use some advanced conversion options, things like if I have to normalize PDF documents to PDF/A, if there are some JPEG quality enhancements which need to be done. Those options can be done here. Some document conversion options, some import options, can also be configured here.
Email notifications and archiving, this is something which I think is very important. For example, the email is not important. What should we do? We have an option to send a notification on an email ID here. We can just give an email ID for sending the notification. Similarly, if you want an email which has failed or not imported to be saved to a folder for future reference, we can select that here.
On this tab we have some additional settings. If we have to create some custom scripts and all, we can always use those here, and then there are some error handling settings which can be given here. How do we want to handle our errors? Do we want to import message and send them to QC? The way we want to handle error. We want to import the message, reject message. Things like that.
We can also handle the document conversion errors here, if you want to reject message if conversion fails, if you want to send it to Quality Control if the conversion fails, or we can also display the import exception default page if the conversion fails.
Once we have configured all these settings, I will just do okay to this. The next thing which we are going to do is add the connection. Connection, I’m going to give it a name here, DemoConnection. I will hit test connection to make sure my setup is fine, my services are running, there is no problem.
My test connection was successful. I will add the mailbox import here, give a name to my mailbox import. Poll cycle is 60 seconds, which means that I want, every 60 seconds, the emails to be polled and start getting imported into Kofax.
I’m going to use Gmail here. I will use pop.gmail.com as host. The protocol would be POP3 for my demonstration. However, there are other options, like EWS, IMAP. Typically, for Outlook, we use EWS. There are various combinations and options to use with EWS.
We can give the poll mailbox. Right now, it is Inbox, but we can always change it to another folder which exists in Outlook. We can also choose poll sub-folders, which means any emails which are aligned to the sub-folders will also be imported.
We have an option to keep messages on server, which means we can basically archive the emails which are imported into Kofax onto one of the Outlook folders. If I select this, I can provide the processed folder name, which could be any folder on the Outlook where we want our emails to be archived.
For now, I’m going to go back and select POP3 here, and then I will use SSL for my connectivity here. I’m going to give the username here, @gmail.com. Password, and test mailbox. Once I click this, if everything is good with the connection, it should say, “Successful.”
I can do okay to this, okay to this. I need to select the default destination here, which I just created, this add destination section. I will do that and do okay.
The last step would be to start the service. Once my service is started, we are good to start import the emails.
Thank you for watching this.

